
Tag: Gameplay Tips

Yakuza Like a Dragon Tattoo Guide to Designs...

The Yakuza and Like a Dragon series has long used traditional Japanese full-back tattoos, known as irezumi, to tell deep visual stories about its key figures. Rather than serving purely as decorative body art, each ink design reflects the bearer's philosophy, lineage, and personal struggles. Understanding these iconic art pieces provides players with a much richer perspective on the overarching narrative and character arcs.

Narrative Meaning Behind Yakuza Tattoos

In Japanese underworld lore portrayed throughout the franchise, receiving a full-back tattoo represents an immense personal commitment and endurance of pain. The chosen imagery usually reflects a character's destiny, ambition, or internal conflicts. Master horishi artists within the game universe carve these intricate mythic figures to mirror the soul of the warrior carrying them.

Unlike games with completely open character creation tools, the core tattoos in Like a Dragon are fixed narrative elements. Each ink mark is intimately tied to the individual's growth throughout the storyline. As characters evolve through pivotal events, their tattoos symbolize transitions from raw potential to legendary status.

Key Character Tattoo Designs Explained

Protagonist Ichiban Kasuga proudly displays a dragonfish on his back, representing an intermediate stage before becoming a true dragon. This hybrid creature stems from Japanese myth, where a koi swims up a waterfall to earn its draconic form. Ichiban's tattoo perfectly captures his underdog spirit, relentless determination, and journey toward personal greatness.

In stark contrast, legendary protagonist Kazuma Kiryu bears the iconic ascending dragon, symbolizing absolute strength, nobility, and unbreakable resolve. Other prominent figures like Akira Nishikiyama feature a koi, directly foreshadowing his tragic rivalry with Kiryu's dragon. Meanwhile, Goro Majima's terrifying hannya mask reflects his chaotic personality and ferocious combat style in battle.

Outfit and Cosmetic Customization Options

While players cannot alter individual body tattoos on main characters, the game provides extensive cosmetic customization through job outfits and special costumes. Changing jobs at Hello Work unlocks unique apparel that shifts how party members appear during combat encounters. Players can equip classic suit variations, casual streetwear, and nostalgic throwback attire inspired by previous entries in the series.

Special downloadable content and post-game modes offer even broader wardrobe options for the entire active party. These outfits allow fans to showcase different stylistic tastes while exploring the vibrant districts of Ijincho and Kamurocho. Although the underlying irezumi remain untouched, outfit swaps give players creative control over their team's visual aesthetic.

Cultural Authenticity and Irezumi Artistry

Developers at Ryu Ga Gotoku Studio work meticulously to ensure that every tattoo design respects traditional Japanese artistic conventions. The color schemes, background wind bars, and seasonal flora surrounding each mythic beast follow strict irezumi heritage. This dedication to authentic detail grounds the fictional drama in genuine cultural craftsmanship.

By blending traditional tattoo symbolism with modern RPG gameplay, the developers create an unforgettable visual experience. Players learn to read these full-back masterpieces as visual resumes for every ally and rival encountered on the street. Exploring the deeper meaning behind each design ultimately transforms every major boss reveal into a dramatic story milestone.

Yakuza Like a Dragon Tattoo Guide to Designs...

The Yakuza and Like a Dragon series has long used traditional Japanese full-back tattoos, known as irezumi, to tell deep visual stories about its key figures. Rather than serving purely as decorative body art, each ink design reflects the bearer's philosophy, lineage, and personal struggles. Understanding these iconic art pieces provides players with a much richer perspective on the overarching narrative and character arcs.

Narrative Meaning Behind Yakuza Tattoos

In Japanese underworld lore portrayed throughout the franchise, receiving a full-back tattoo represents an immense personal commitment and endurance of pain. The chosen imagery usually reflects a character's destiny, ambition, or internal conflicts. Master horishi artists within the game universe carve these intricate mythic figures to mirror the soul of the warrior carrying them.

Unlike games with completely open character creation tools, the core tattoos in Like a Dragon are fixed narrative elements. Each ink mark is intimately tied to the individual's growth throughout the storyline. As characters evolve through pivotal events, their tattoos symbolize transitions from raw potential to legendary status.

Key Character Tattoo Designs Explained

Protagonist Ichiban Kasuga proudly displays a dragonfish on his back, representing an intermediate stage before becoming a true dragon. This hybrid creature stems from Japanese myth, where a koi swims up a waterfall to earn its draconic form. Ichiban's tattoo perfectly captures his underdog spirit, relentless determination, and journey toward personal greatness.

In stark contrast, legendary protagonist Kazuma Kiryu bears the iconic ascending dragon, symbolizing absolute strength, nobility, and unbreakable resolve. Other prominent figures like Akira Nishikiyama feature a koi, directly foreshadowing his tragic rivalry with Kiryu's dragon. Meanwhile, Goro Majima's terrifying hannya mask reflects his chaotic personality and ferocious combat style in battle.

Outfit and Cosmetic Customization Options

While players cannot alter individual body tattoos on main characters, the game provides extensive cosmetic customization through job outfits and special costumes. Changing jobs at Hello Work unlocks unique apparel that shifts how party members appear during combat encounters. Players can equip classic suit variations, casual streetwear, and nostalgic throwback attire inspired by previous entries in the series.

Special downloadable content and post-game modes offer even broader wardrobe options for the entire active party. These outfits allow fans to showcase different stylistic tastes while exploring the vibrant districts of Ijincho and Kamurocho. Although the underlying irezumi remain untouched, outfit swaps give players creative control over their team's visual aesthetic.

Cultural Authenticity and Irezumi Artistry

Developers at Ryu Ga Gotoku Studio work meticulously to ensure that every tattoo design respects traditional Japanese artistic conventions. The color schemes, background wind bars, and seasonal flora surrounding each mythic beast follow strict irezumi heritage. This dedication to authentic detail grounds the fictional drama in genuine cultural craftsmanship.

By blending traditional tattoo symbolism with modern RPG gameplay, the developers create an unforgettable visual experience. Players learn to read these full-back masterpieces as visual resumes for every ally and rival encountered on the street. Exploring the deeper meaning behind each design ultimately transforms every major boss reveal into a dramatic story milestone.

How Much Is Titan Holo Worth: Value and...

The Katowice 2014 Titan (Holo) sticker is widely recognized as one of the most iconic and valuable digital collectibles in the history of Counter-Strike. Originally released as part of the EMS Katowice 2014 Legends capsule, this item has seen an astounding surge in market value over the years. Understanding its current market valuation, historical price trajectory, and key trading dynamics is essential for collectors and investors alike.

Current Valuation and Market Dynamics

As of recent market evaluations, an unapplied Titan (Holo) Katowice 2014 sticker is valued well into six figures, with listings often spanning between $50,000 and over $100,000 depending on platform demand. Because the supply of unapplied stickers is extremely limited, public sales are rare and frequently occur through specialized peer-to-peer deals rather than standard community markets. Factors such as whether the sticker remains unapplied or is attached to a weapon skin significantly impact its overall transactional worth.

Key Factors Driving High Value

The incredible valuation of the Titan Holo stems primarily from its severe scarcity and aesthetic popularity. Released during the early era of CS major tournaments, very few capsules were opened, and even fewer holographic stickers were preserved unapplied. Its striking blue holographic effect and association with a legendary esports organization make it a premier status symbol in the gaming community.

Trading Practices and Safe Transactions

Trading high-tier items like the Titan Holo requires strict adherence to security protocols due to the substantial financial value involved. High-value collectors typically utilize reputable third-party marketplaces or trusted escrow services to facilitate safe exchanges. Verifying the authenticity of trade offers and inspecting the item's precise state before completing any deal is vital to preventing potential fraud.

Value Differences: Applied vs Unapplied

An unapplied sticker commands a massive premium because it offers absolute flexibility for future collectors or custom crafters. Conversely, once a sticker is applied to a weapon skin, its standalone value drops to a fraction of the unapplied price. However, high-grade skins featuring multiple Katowice 2014 Titan Holo stickers can still command six-figure price tags on specialized trading platforms.

Best TV for College Students and Features Worth...

Moving into a dorm room or shared apartment requires careful planning when choosing entertainment hardware that fits limited spaces and modest budgets. Finding a balance between screen size, smart functionality, and affordability ensures students get maximum value for their living area. Selecting the right television transforms a cramped bedroom into a versatile hub for studying, gaming, and relaxing with friends.

Ideal Screen Sizes for Campus Living

For most standard dormitories, compact displays ranging between 32 inches and 43 inches offer the best fit without cluttering limited desk or counter space. These dimensions allow comfortable viewing distances from a bed or desk chair while remaining lightweight enough for easy transport during move-in days. Larger shared apartments might accommodate 50-inch or 55-inch models, provided common areas offer sufficient wall clearance.

Smart Platforms and Built-In Features

Integrated smart operating systems eliminate the need for extra set-top streaming boxes, helping keep cord clutter to a minimum. Operating platforms like Google TV, Roku OS, and Fire TV give immediate access to popular media streaming apps via built-in Wi-Fi connections. Voice-enabled remotes and companion mobile apps also make navigating content simple during late-night study sessions or group movie nights.

Essential Connectivity Options

Multiple input ports are necessary for students who plan on hooking up laptops, gaming consoles, and secondary audio equipment simultaneously. Having at least two to three HDMI ports prevents the hassle of constantly swapping cables behind the unit. Low input lag and fast refresh rates also provide smoother gameplay for casual or competitive console gaming.

Budget Planning and Audio Quality

Affordable LED and QLED models deliver vibrant picture quality while maintaining accessible price points for student budgets. Because compact televisions often have smaller built-in speakers, prioritizing models with clear dialogue enhancements or Bluetooth headphone support helps prevent disturbing roommates. Investing in energy-efficient displays also ensures lower power consumption throughout the academic year.

Is There Sex In GTA And What Mature...

The Grand Theft Auto series has long been famous for pushing boundaries and sparking debates surrounding video game content. Players exploring the open-world franchise often wonder how sexual themes are handled within its gameplay. Understanding these adult elements helps parents and gamers make informed choices before diving in.

Explicit Content and Sexual Themes in the Game

While Grand Theft Auto includes suggestive themes, explicit graphic sexual encounters are not directly fully rendered on screen. Instead, the game uses implied cutscenes, camera angles, and comedic sound effects to convey mature encounters without full explicit detail. Players can visit specific nightlife locations, but the gameplay maintains a boundary regarding graphic nudity.

The franchise consistently relies on satire and humor when dealing with romantic or sexual interactions. Rather than focusing on realism, these mechanics often serve as minor side activities or satirical commentary on modern nightlife. This approach allows the game to maintain its mature rating without crossing into explicit adult material.

Violence, Language, and Other Mature Elements

Sexual themes are only a small portion of the overall adult content featured throughout the open-world titles. Players frequently encounter heavy coarse language, drug references, and intense violence during storyline missions. These elements are central to the game's portrayal of criminal underworlds and urban chaos.

Additionally, mature themes like gambling, political satire, and substance abuse appear prominently in cutscenes and radio stations. The combination of these factors makes the game suitable strictly for older audiences. Understanding the full scope of content helps players know what to expect beyond simple rumors.

Parental Controls and Rating Insights

Every installment in the modern Grand Theft Auto series carries an M for Mature rating from the ESRB. This rating warns consumers about intense violence, blood, strong language, and sexual content before purchase. Major gaming consoles provide customizable parental control tools that can restrict access to these titles entirely.

Parents can utilize system settings to restrict gameplay based on age ratings and online feature access. Monitoring play sessions or reviewing content advisories allows families to manage gaming habits effectively. Taking advantage of these built-in system tools ensures a safer gaming environment for younger household members.

Best Medium Tank Division HOI4 Templates For Effective...

Mastering armored warfare in Hearts of Iron 4 requires a deep understanding of how combat width, breakthrough, and soft attack interact on the battlefield. Medium tanks serve as the backbone of most offensive operations due to their balanced production cost and excellent combat statistics. Creating the perfect division layout ensures your armored forces can pierce enemy lines quickly and encircle opposing armies without losing too much organization.

Designing the Optimal Armored Combat Width

Selecting the right combat width is crucial for maximizing your division efficiency across different terrain types like plains and forests. A combat width of 35 or 36 has emerged as a highly effective baseline for medium tank formations executing major breakthroughs. This size allows your units to fit perfectly into major combat zones without incurring heavy stacking penalties during large-scale operations.

To achieve this specific width, players usually combine eight or nine medium tank battalions with an equal number of motorized or mechanized infantry units. This precise balance ensures that your division retains enough organization to stay in the fight while maximizing its offensive capabilities. Maintaining your organization level above thirty is generally recommended to prevent your spearheads from melting away during prolonged engagements.

Balancing Soft Attack and Breakthrough Statistics

The primary role of an armored division is to deal massive damage to enemy infantry while utilizing high breakthrough to minimize incoming casualties. When designing your actual tank chassis, focusing on high-capacity medium cannons or howitzers will give you the soft attack necessary to wipe out entrenched frontline units. A quality armored division should aim for at least three hundred soft attack by the early wartime years to remain impactful.

Breakthrough acts as your defensive shield while attacking, forcing enemy shots to miss and keeping your expensive equipment intact. If your templates are lacking in this area, your divisions will suffer heavy operational losses even when winning battles. can be supplemented by upgrading your tank chassis with better radios and three-man turrets before starting mass production.

Essential Support Companies for Armored Success

Support units provide massive stat modifiers and utility adjustments without altering the combat width of your main fighting battalions. An engineer company is universally required because it grants vital movement and attack bonuses across rivers and rough terrain. Adding a logistics company is equally critical since armored units consume massive amounts of fuel and supply during rapid deep penetrations.

For maximum offensive output, incorporating a medium flame tank support company offers unmatched combat multipliers across almost all terrain types. Maintenance companies can also be integrated if you are utilizing expensive designs and need to keep your reliability high. Finally, support anti-air remains highly beneficial for mitigating the devastating penalties caused by enemy close air support aircraft.

Transitioning from Motorized to Mechanized Infantry

In the early stages of the game, motorized infantry is the most cost-effective option to provide the necessary organization and hit points for your tanks. As your industrial capacity grows, slowly swapping these trucks out for mechanized equipment will drastically increase your division hardness. This conversion protects your manpower from soft attack damage and makes your spearheads nearly unstoppable against standard infantry armies.

How To Bluetooth Connect PS4 Controller To PC...

Repurposing your PlayStation hardware for computer gaming is an excellent way to enjoy a premium controller experience without buying new accessories. While the DualShock 4 is optimized for Sony consoles, its integrated wireless technology allows for seamless synchronization with modern Windows operating systems. By establishing a wireless connection, you can eliminate cluttered cables and enjoy your favorite PC gaming titles from the comfort of your couch.

Activating Pairing Mode on your DualShock 4

Before your computer can detect the controller, you must manually force the peripheral into its official discovery state. To begin, ensure that your DualShock 4 is completely powered off and disconnected from any active console links. Press and hold the central PS Button and the Share Button simultaneously for approximately three to five seconds.

You will know the sequence was successful when the light bar on the back starts flashing rapidly with a bright white pattern. This distinct flashing state indicates that the controller is actively broadcasting its wireless signature to nearby devices. Make sure to initiate the computer configuration immediately while the light bar is still flashing to prevent the device from timing out.

Configuring Windows Bluetooth Settings

With your gamepad actively broadcasting, you need to navigate to the wireless management hub on your desktop or laptop. Open the Windows Settings menu by pressing the Windows Key and the letter I on your keyboard, then select the Bluetooth and Devices category. Click on the large button labeled Add Device at the top of the interface and select the primary Bluetooth option from the popup prompt.

Your operating system will automatically begin scanning the immediate area for available wireless hardware signals. Within a few moments, a new device option labeled Wireless Controller or DualShock 4 Wireless Controller should populate the list of nearby assets. Click on this specific entry to begin the automated pairing protocol between your computing system and the gamepad peripheral.

Finalizing Setup and Driver Integration

Once selected, the Windows operating system will automatically download basic generic HID inputs to establish a stable operational foundation. The rapid flashing on your controller light bar will shift into a solid, continuous color indicating a successful pairing bond. If your system prompts you for an authorization code during this process, simply enter four zeros to bypass the security layer manually.

While Windows recognizes the peripheral immediately, some independent game libraries require an XInput translation layer to translate the buttons properly. Many players rely on built-in client configuration tools like Steam Input to map their preferred layouts automatically across different titles. These applications allow you to customize the internal gyroscope, adjust individual thumbstick deadzones, and even modify the light bar colors to match your personal aesthetic preferences.

Troubleshooting Common Wireless Delays

If you experience unexpected input lag or random disconnections during intense gameplay sessions, check for local signal interference. Placing your computer tower underneath a heavy desk or near powerful wireless routers can severely disrupt the low-energy Bluetooth signal path. Utilizing a dedicated external USB extension cable for your wireless receiver dongle can dramatically improve structural line-of-sight tracking and performance.

For situations where the device refuses to sync entirely, a hard manual reset of the gamepad hardware often resolves persistent configuration glitches. Locate the small pinhole hidden on the reverse side of the casing near the secondary trigger button housing. Insert a small paperclip into the cavity for five seconds to completely clear out internal memory before attempting the pairing process again.

Steam Download Content File Locked Error Fixes and...

Encountering a sudden update interruption can be incredibly frustrating for PC gamers trying to launch their favorite titles. The notorious content file locked error usually indicates that the Steam client is unable to overwrite or modify specific files on your storage drive during the download process. Understanding the underlying system permissions and folder conflicts is essential for clearing this digital roadblock and restoring smooth functionality to your platform.

Verify Game Files and Check System Permissions

The most reliable initial step involves using the built-in validation tool to check the current state of your local installation directory. Simply right-click on the problematic game within your digital library, navigate to properties, and select the option to verify the integrity of the game files. This process forces the application to re-examine the storage folder and repair any misplaced or corrupted components automatically without requiring a full reinstallation.

In many instances, the local operating system restricts background processes from modifying specific directory data due to rigid access settings. Navigating directly to the main folder where the application is installed and manually unchecking the read-only attribute can immediately resolve these security roadblocks. Providing your active system profile with full administrative control ensures that the updater can execute its tasks without encountering sudden write violations.

Manage Security Software and Background Processes

Antivirus utilities and real-time scanning programs are frequent culprits behind unexpected data lockouts on modern gaming computers. These defensive tools occasionally misidentify a harmless game file patch as a potential security risk, isolating the asset and preventing any subsequent alterations. Temporarily disabling your active firewall or adding your primary directory to the software exclusion list can safely bypass this false positive detection.

Additionally, local storage drives that are heavily cluttered with temporary system data may experience processing delays during intensive update operations. Utilizing built-in optimization tools like Disk Cleanup allows you to clear out junk data that might be secretly tethered to active system tasks. Restarting your machine in safe mode can also help you isolate the issue by preventing third-party programs from running automatically during startup.

Clear Local Download Cache and Reset Storage Paths

When internal configuration data becomes bottlenecked, resetting your client preferences can refresh the entire installation queue. The digital storefront provides a dedicated option within its main settings menu to clear the download cache, which logs out your active profile and clears pending files. Performing this rapid refresh forces the network client to build a new data stream and often cleans up lingering write errors.

If the file restriction persists on a specific hard drive, configuring an entirely new library folder on an alternate drive can provide a permanent remedy. Moving your critical gaming installations to a freshly formatted solid-state drive helps bypass complex permission bugs that commonly plague older operating system installations. This strategic approach ensures a clean environment where software upgrades can proceed smoothly without encountering unexpected administrative blocks.

disney dreamlight valley bell pepper puffs Recipe and...

Disney Dreamlight Valley offers players a delightful culinary system where cooking meals can restore energy, increase friendship levels, and complete unique villager duties. Among the various appetizers available, Bell Pepper Puffs stand out as a highly useful three-star meal that is relatively easy to prepare early in the game. Understanding how to gather the necessary items and execute the combination ensures you can maximize your productivity around the magical village.

The Essential Three Ingredients Required

To cook this appetizing dish, you must collect exactly three specific ingredients from different biomes across the valley. The recipe requires one bell pepper, one egg, and one carton of cheese to create the perfect culinary balance. Bringing these components together at any cooking station will guarantee a successful preparation without wasting valuable resources.

Acquiring the primary ingredient requires access to the Forest of Valor, where Goofy sells bell pepper seeds at his local stall. Once planted in your garden plots, these seeds take approximately fifteen minutes of real time to mature before you can harvest them. Preparing a solid crop rotation ensures you always have a steady supply of fresh produce ready for your cooking needs.

Unlocking the Remys Pantry Items

The remaining two ingredients cannot be grown or found growing wild throughout the environment. Instead, you must progress through the main story campaign until you successfully convince Chef Remy to return to the village. Rebuilding his restaurant unlocks his specialized pantry store where premium dairy and animal products are sold directly to the player.

Both the eggs and the cheese are readily available on his shelves for a fixed amount of Star Coins. Stocking up on these staple ingredients allows you to cook complex recipes whenever an emergency arises or a villager requests them. Managing your coin budget efficiently will help you maintain a healthy inventory of these essential culinary components.

How to Cook and Utilize the Puffs

Once you have gathered the required items, approach any standard stove found inside your home or at Chez Remy. Throwing the bell pepper, egg, and cheese into the cooking pot alongside a single piece of coal will instantly produce the desired appetizer. The process is completely streamlined, allowing players to mass-produce meals with minimal effort.

Consuming the finished meal provides a significant boost to your character energy pool, helping you clear large obstacles or fish for longer periods. Alternatively, selling the appetizer at any of Goofy stalls will return a decent amount of profit to fund your future building projects. Many characters also request this dish as one of their daily favorite gifts, making it an excellent tool for boosting friendship points quickly.

Windows Sonic for Headphones On or Off for...

Achieving the perfect audio setup is just as critical as maintaining a high frame rate when it comes to competitive gaming. Microsoft offers a built-in spatial sound solution designed to simulate a 3D surround sound environment through standard stereo headsets. Deciding whether to keep this feature toggled on or off depends heavily on the specific games you play and your current hardware configuration.

Understanding Spatial Audio Simulation

Windows Sonic works by utilizing software algorithms to alter how multi-channel audio tracks are mixed into your traditional stereo headphones. It mimics human hearing mechanics by introducing subtle delays and frequency shifts to help your brain pinpoint sound locations. This virtual processing aims to give players a better sense of height and depth during intense gameplay moments.

However, the software layer can occasionally clash with the native sound engines built directly into modern video games. Many developers now integrate proprietary spatial sound tech like Dolby Atmos or custom binaural engines right into their software code. When multiple virtual surround systems try to process the same audio signal simultaneously, the resulting soundscape can become muddy or distorted.

When to Keep Windows Sonic Enabled

Leaving Windows Sonic turned on is highly beneficial when playing older titles or games that only output basic stereo or 7.1 surround sound. It effectively upmixes those standard channels to provide a more immersive environmental depth that standard stereo mixing lacks. Players often notice an improved ability to detect footsteps and distant gunfire in sprawling open-world multiplayer environments.

Casual gamers who use budget-friendly stereo headsets will likely find the free feature to be a noticeable upgrade over basic configurations. It offers a cost-effective taste of directional audio tracking without forcing you to purchase expensive premium hardware. If your favorite game lacks a dedicated headphone virtualization toggle, letting Windows handle the spatial processing is usually the best approach.

Scenarios Where Disabling the Feature Is Best

You should immediately turn Windows Sonic off if your tactical shooter already features a built-in Head-Related Transfer Function or HRTF option. Tactical titles like Escape from Tarkov or Counter-Strike are carefully tuned to deliver pinpoint directional audio completely independent of Windows settings. Activating Windows Sonic on top of these advanced native engines will actively ruin your directional awareness and distort distance tracking.

Audiophiles utilizing high-end studio monitors or hardware-driven surround sound mixamps should also keep the software toggle disabled. This ensures you receive a pure, unadulterated audio stream directly from the game engine without unnecessary digital filters. If you want to dive deeper into maximizing your setup, you can check out the latest gaming audio guide to optimize your platform settings.

Finding Your Ideal Audio Balance

The absolute best way to decide between turning the feature on or off is to conduct real-time testing in your favorite multiplayer maps. Load into a practice arena with Windows Sonic enabled and listen closely to the verticality of explosive sounds and ambient noises. After a few rounds, disable the spatial option completely to compare how clean and crisp the native stereo separation feels.

Every individual perceives sound slightly differently due to the physical shape of their ears and personal listening preferences. Hardware build quality, driver size, and open-back versus closed-back headphone designs will also heavily influence the final acoustic results. Ultimately, prioritizing clarity and positional accuracy over artificial cinematic echo will give you the biggest competitive edge.

Lies Of P Stat Caps And Build Planning

Lies of P challenges action RPG enthusiasts with its intricate combat mechanics and deep character customization systems. Crafting the perfect version of Pinocchio requires an understanding of how your chosen attributes grow over time. Maximizing your efficiency in Krat depends heavily on balancing your levels to avoid hitting severe diminishing returns.

Understanding Soft Caps in Lies of P

In this dark world, every level invested into your core attributes yields statistical improvements to help you survive. However, as you climb higher, you will notice that the rewards per point spent begin to drop significantly. This point of diminishing returns is known as a soft cap, and identifying it helps optimize your resource management.

For primary defensive statistics like Vitality and Vigor, investment remains highly efficient until you reach around 30 to 40 points. Beyond this threshold, your health pool and stamina recovery increase at a much slower rate. Keeping your primary survival metrics near these ranges allows you to endure intense boss fights without wasting levels.

Optimizing Damage Attributes and Scaling

Your primary offensive capabilities are determined by three main build paths: Motivity, Technique, and Advance. Motivity focuses on heavy, hard-hitting weapons while Technique favors swift, precise strikes. Advance serves as the core stat for elemental scaling, governing fire, electric blitz, and acid damage types.

All three offensive attributes experience a noticeable soft cap shift when they reach approximately 30 points. If you choose to specialize in a singular stat, pushing it beyond 40 points yields negligible raw attack power bonuses. Strategic build planning often involves diversifying into a secondary stat once your main scaling attribute reaches its peak effectiveness.

The Value of Capacity and Equipment Management

Unlike standard action RPG statistics, Capacity functions uniquely because it does not suffer from traditional soft caps. Every point invested into Capacity consistently increases your maximum weight limit and legion caliber capacity. This allows you to equip heavier defensive parts and advanced amulets without suffering from sluggish movement penalties.

Managing your total weight percentage is crucial for executing fast rolls and maintaining stable stamina regeneration. Many successful players find that continually raising Capacity provides better overall utility than over-leveling a capped damage stat. Keeping your burden under the slightly heavy threshold keeps your character agile in crucial moments.

Strategic Build Planning for New Game Plus

Transitioning into end-game content and subsequent playthroughs requires a shift in how you allocate your accumulated Ergo. A balanced approach often outperforms a hyper-focused setup as baseline level requirements become incredibly expensive. Combining Motivity and Technique creates a versatile quality build capable of using the most diverse weapon combinations.

Investing early points into your foundational survivability metrics creates a comfortable safety net for learning complex enemy parry timings. Once those boundaries are stable, allocating resources toward scaling attributes enhances your damage output safely. Proper build preparation ensures your journey through Krat remains rewarding and manageable from start to finish.

Steel Gigas Persona 3 Reload Weakness And Battle...

Exploring the sprawling floors of Tartarus in Persona 3 Reload presents players with a wide variety of formidable shadow encounters. Among the early challenges encountered within the Arqa block, the massive Steel Gigas stands out as a serious test of endurance. Navigating this powerful opponent requires a firm understanding of its elemental vulnerabilities and offensive capabilities.

Identifying the Steel Gigas Weakness

The key to conquering this intimidating wrestler shadow lies in exploiting its specific elemental vulnerabilities. In Persona 3 Reload, the Steel Gigas is uniquely weak to Electricity and Light magic attributes. Landing a shocking attack from these specific magic types will instantly knock the giant creature off balance.

Conversely, players should completely avoid utilizing standard physical Strike attacks during this battle sequence. This particular shadow boasts a high resistance to heavy blunt strikes, making physical engagements highly inefficient. Striking with magic remains your absolute best path toward securing an immediate tactical advantage.

Building the Optimal Party Composition

Assembling the perfect squad makes a massive difference when facing down this formidable brute in the upper sections of Tartarus. Bringing Akihiko Sanada along is highly recommended because his persona inherently specializes in devastating Zio electric skills. His presence allows your team to consistently down the target without consuming your main character's valuable resources.

For players looking to maximize their utility outside of direct combat, managing resources through a Steam account provides a great platform for checking global player achievements and strategies. If Akihiko is not currently available in your active party rotation, ensure the protagonist has equipped a Persona capable of casting electric or light spells. Keeping a dedicated healer on standby will also help mitigate the incoming damage from the shadow's heavy attacks.

Executing the Perfect Battle Strategy

The fundamental rhythm of this encounter revolves around triggering consecutive All-Out Attacks to deplete the enemy's health pool safely. Start the fight by using your fastest character to exploit the monster's elemental vulnerability. Once the Steel Gigas is downed, immediately initiate a full team assault to deliver massive damage numbers.

It is equally critical to maintain proper defensive spacing and buff configurations throughout the longer engagement. This shadow frequently utilizes powerful physical attacks that can easily devastate unprepared party members in a single turn. Buffing your team's overall evasion and physical defense will provide an excellent safety net while you wait for your offensive openings.

Starfield Siren of the Stars Mission Walkthrough and...

Navigating the complex faction storylines in Starfield often brings players into contact with unique locations and high-stakes moral dilemmas. During the Crimson Fleet questline, the mission titled Breaking the Bank requires you to infiltrate a luxury cruise liner known as the Siren of the Stars. This operation demands a delicate balance of stealth, diplomacy, and decisive action to secure the required Earth Savior Award and vital evidence without alerting the authorities.

Boarding the Luxury Cruise Liner

Your journey begins by locating and docking with the massive vessel in the Aranae system. Once on board, the atmosphere shifts from space combat to corporate intrigue and high-society social interactions. You must speak with Captain Evgeny Rokov to gather initial intelligence regarding your primary target, Larry Dumbrosky.

Rokov is willing to assist, but his help comes with specific conditions that can impact your standing. Balancing the desires of the Crimson Fleet with your own moral alignment requires careful dialogue selections during these early conversations. Exploring the passenger decks thoroughly before making major moves will reveal additional avenues for completing your objectives.

Tracking Down Larry Dumbrosky

Finding Larry Dumbrosky is only the first step in this multi-layered infiltration assignment. He spends his time in the ballroom area, closely guarded and suspicious of strangers asking too many questions. To break through his defenses, you need to interact with various society members and find leverage against him.

Speaking with specialized vendors and elite guests on the ship will yield clues about his recent illicit financial transactions. Gathering this information opens up alternative paths to resolve the encounter peacefully rather than resorting to violence. You will eventually uncover his connection to a corporate scheme involving stolen credentials.

The Core Choices and Consequences

The climax of the mission presents players with a defining choice on how to handle the confrontation with Dumbrosky. You can choose to blackmail him using the financial data you discovered, forcing him to surrender the security credentials quietly. This approach keeps the ship calm and satisfies the stealth requirements of the United Colonies SysDef commanders.

Alternatively, players can choose to eliminate him directly, though this triggers an immediate ship-wide lockdown and alerts security forces. Resorting to open combat makes exiting the vessel significantly more dangerous and complicates your relationship with faction leaders. Choosing the diplomatic route typically yields smoother long-term rewards and protects innocent bystanders on the liner.

Securing the Earth Savior Award

In addition to confronting Dumbrosky, you must steal the legendary Earth Savior Award from the ship's secure vault room. Accessing this area requires obtaining a specific keycard or utilizing advanced lockpicking skills to bypass the digital security systems. The award serves as an optional but highly lucrative trophy for the Crimson Fleet.

Once the artifact is secured and Dumbrosky is handled, you must navigate back to your docked spaceship. Completing these tasks successfully allows you to transition back into the open galaxy to report your findings. The decisions made aboard this luxury liner will continue to echo through the remainder of your faction campaign.

TOTK Iun Orok Shrine Location and Puzzle Solution

Navigating the sprawling world of Hyrule in The Legend of Zelda: Tears of the Kingdom frequently leads adventurers to hidden trials buried deep beneath the surface. One such challenge is the Iun Orok Shrine, a location that tests your understanding of physics, momentum, and item manipulation using the Ultrahand ability. Unlocking this specific zone requires exploring an intricate cave network filled with environmental hazards and aggressive underground creatures.

Finding the Hidden Entrance in Tanagar Canyon

To begin this quest, you must journey to the border of the Tabantha Frontier and Hebra regions where the massive Tanagar Canyon cuts through the landscape. The shrine itself is located far below the surface cliffs inside the Tanagar Canyon West Cave, just east of the path connecting Nero Hill and Piper Ridge. Gliding down to the canyon floor reveals a cave opening hidden behind massive deposits of breakable rock formations.

Before venturing inside, it is highly recommended to stock up on fused rock weapons or explosive bomb arrows to clear the path efficiently. The interior tunnels are heavily guarded by Stone Pebblits and elemental Like Likes that can easily disrupt your exploration if you are unprepared. Clearing these obstacles requires patience as you smash through consecutive layers of red and blue stone walls.

Mastering the First Spherical Puzzles

Upon entering the shrine, labeled as The Right Roll, you will immediately encounter the central puzzle theme involving large metallic spheres. The introductory puzzle features a singular large iron orb placed next to a wide, descending stone ramp. You simply need to lift the sphere with Ultrahand and place it centrally so it rolls directly into the massive bullseye switch at the bottom.

The second chamber introduces an increased level of difficulty with a ramp that splits down the middle with heavily angled sides. Dropping a single orb will cause it to slide off the track, meaning you must fuse two spheres together side-by-side to distribute the weight evenly. Sending this combined contraption down the center ensures it maintains its balance long enough to strike the target successfully.

Securing the Hidden Treasure Chest

Before completing the final trial, looking to the side reveals a separate platform where a hidden reward awaits clever players. You will find three available iron spheres of varying dimensions that can be attached to form a makeshift staircase. By carefully aligning the objects from largest to smallest, you can comfortably ascend to the ledge containing the prize.

Alternatively, players can utilize the versatile Recall ability on a single orb after lifting it up high to create an artificial elevator platform. Opening this optional chest rewards you with a valuable bundle of arrows to replenish your ranged arsenal for future journeys. Taking the time to collect these extra materials provides a helpful boost before attempting the final puzzle sequence.

Solving the Final Curved Ramp Challenge

The definitive test in this shrine features a winding, steeply inclined ramp that curves sharply toward a distant target switch on the wall. The game encourages you to fuse multiple spheres at specific angles so they counter the curvature of the track as they roll down. However, many players find success by constructing a longer hook-shaped apparatus that can reach the target directly.

Using Ultrahand to extend the combined spheres as close to the target as possible before dropping them is a reliable strategy that avoids unpredictable rolling physics. Once the bullseye glows green, the final doorway will unlock, allowing you to claim your Light of Blessing. Understanding these creative building mechanics ensures a smooth victory over one of the region's trickiest puzzle rooms.

How To Brush Your Horse In RDR2

Exploring the vast and beautifully detailed world of Red Dead Redemption 2 requires a reliable companion by your side, and nothing fits that role better than your trusted steed. However, as you traverse dusty trails, muddy swamps, and harsh weather conditions, your mount will inevitably accumulate dirt and grime. Keeping your animal clean is not merely a cosmetic choice, as a dirty coat gradually drains its core health and reduces its overall performance over time.

Unlocking the Horse Brush in Chapter Two

Before you can begin grooming your mount on the trail, you must obtain the necessary equipment through narrative progression. The fundamental tool is unlocked during the Chapter Two mission titled Exit Pursued by a Bruised Ego, where Arthur Morgan assists Hosea Matthews with hunting a legendary bear. During this specific story segment, you will visit the Valentine stable to manage your animals and receive the brush completely free of charge.

Many newcomers try to clean their animals prematurely by riding through deep rivers or rainstorms, but this only provides a temporary and incomplete solution. Acquiring the permanent tool ensures you can maintain optimal statistics without needing to search for nearby bodies of water. Once it is added to your inventory, the item remains with you permanently throughout the rest of your frontier journey.

How to Brush Your Horse on Foot and Horseback

Grooming your animal can be done easily whether you are standing right next to them or sitting directly in the saddle. When on foot, approach your mount slowly, focus your view on them using the target button, and select the designated brush option from the contextual prompt menu. Arthur will then perform a brief animation, smoothing out the coat and instantly removing accumulated mud spots.

If you prefer to maintain your momentum while exploring the open world, you can also perform this essential maintenance while riding at a slow pace. Open the radial item wheel, navigate over to the horse tab, and select the grooming tool from the rightmost slot to trigger a quick cleaning animation. This alternative method allows you to look after your mount during long journeys without needing to dismount every single time.

The Practical Benefits of Regular Grooming

Consistently maintaining your animal's coat plays a massive role in building a stronger relationship and unlocking unique mechanical advantages. Each grooming session rewards you with positive bonding points, which steadily increase your connection level over time. Higher bonding tiers unlock advanced maneuvering abilities such as rearing, skidding, and drifting across difficult terrain.

Furthermore, a clean coat directly impacts survival by preventing a persistent drain on the animal's physical conditioning cores. When mud covers your steed, a specialized red icon will appear inside the health core indicating that performance is actively compromised. Addressing this issue immediately ensures that your mount retains its maximum sprinting capabilities and health pool during sudden enemy ambushes.

Best Four Player Couch Co Op Games on...

Gathering friends around a single television screen remains one of the most fulfilling traditions in modern interactive entertainment. The PlayStation 5 provides an exceptional platform for these shared experiences, offering advanced processing power that keeps complex physics and multi-character animations running smoothly during intensive local play. Finding the right title that accommodates a full group of four players simultaneously requires balancing mechanical depth with accessible group dynamics.

Chaos and Culinary Coordination in Overcooked All You Can Eat

This definitive bundle combines remastered versions of legendary cooking simulators into one chaotic package built perfectly for four players. Teams must work together in bizarre kitchen environments to prepare and serve complex food orders while dealing with shifting level layouts. Communication is entirely vital to prevent total disaster as fires break out and moving platforms divide your workforce.

The title introduces comprehensive accessibility settings that allow groups to adjust time limits or simplify recipes to match differing skill levels. Navigating the frantic pacing requires distinct roles, making it excellent for testing team cohesion during lively gatherings. It stands out as a premier example of cooperative design that demands constant verbal coordination from everyone on the sofa.

Whimsical Platforming in Sackboy A Big Adventure

For groups seeking a beautifully crafted cooperative journey, this vibrant 3D platformer offers incredible charm alongside intricate level mechanics. Up to four participants can navigate the imaginative worlds of Craftworld together, utilizing unique gadget combinations and physics-based interactions to overcome obstacles. The level architecture dynamically shifts to encourage mutual assistance, ensuring no player feels left behind during the journey.

The developers implemented specific team-based levels that require precise synchronization to unlock hidden collectibles. Players can pick up and throw their companions to reach high platforms or overcome challenging environmental puzzles. This playful freedom ensures that even casual gaming sessions remain deeply engaging and full of spontaneous laughter.

Strategic Mayhem in Moving Out 2

Moving furniture transforms into an absurd physical challenge within this colorful physics-based simulator designed around frantic four-player dynamics. As trained moving experts, your group must coordinate the rapid evacuation of various household items into a waiting delivery truck. The presence of surreal hazards like magical portals and moving obstacles ensures that standard moving strategies quickly dissolve into hilarious chaos.

Success relies heavily on heavier items that require multiple players to lift and carry across narrow pathways safely. The intuitive layout means anyone can contribute immediately, though mastering the optimal angles and throwing mechanics offers rewarding depth for experienced groups. It provides a unique balance of spatial puzzle solving and unscripted physical comedy that thrives in a local group setting.

Choosing the Perfect Game for Your Group

Selecting the ideal four-player experience depends greatly on the collective patience and gaming background of your assembled gathering. Action platformers provide a smooth learning curve for mixed skill sets, whereas intensive management simulations reward highly structured communication styles. Exploring these diverse options ensures your next multiplayer evening delivers memorable entertainment for everyone involved.

The Gates of Atlantis Quest in Assassin's Creed...

The Gates of Atlantis quest in Assassin's Creed Odyssey serves as a pivotal bridge between historical Greek drama and rich ancient Isu mythology. Players who venture into the sunken ruins on Thera discover a gateway that completely alters the scope of their journey. Unlocking this ancient entrance requires strategic preparation, formidable combat skills, and an eagerness to explore the outer reaches of the map.

Unlocking the Hidden Path to Thera

Players begin this storyline after completing key narrative milestones in the main campaign, leading them to the volcanic island of Thera. Upon navigating the treacherous environment, you discover ancient mechanisms and light puzzles that seal the entry to the hidden cavern. Solving these environmental challenges reveals Pythagoras, who entrusts you with securing the gateway against future threats.

To permanently seal the portal, players are tasked with gathering four ancient artifacts hidden across the Greek world. Preparing properly for these missions involves upgrading high-tier gear and refining combat abilities before facing legendary challenges. Many players consult detailed walkthroughs or check out a gaming guide to optimize their builds for the intense encounters ahead.

Defeating the Mythical Guardians

Acquiring each artifact requires overcoming legendary beasts derived from classical Greek folklore. You must face the Sphinx on Boeotia, outsmarting her with answers to complex riddles rather than relying solely on brute force. Other artifacts require defeating terrifying bosses including the Minotaur in Messara, the Cyclops on Kythera, and Medusa in Lesbos.

Each battle demands a unique tactical approach to handle status effects, ranged attacks, and fast area-of-effect abilities. Medusa in particular tests a player's timing and dodge mechanics due to her petrifying gaze and summoned stone warriors. Defeating these iconic guardians rewards you with the necessary keys while delivering some of the most memorable boss fights in the game.

Sealing the Gateway and Narrative Impact

Returning all four artifacts to the sunken city completes the primary objectives of the questline. Inserting the keys triggers significant narrative revelations regarding the Isu civilization and the true heritage of the Eagle Bearer. This climax also connects directly to modern-day events involving Layla Hassan as she seeks to preserve world balance.

Completing this storyline provides crucial context for players interested in diving deeper into the game's expansive story arcs. It delivers substantial rewards, including legendary weapons and vast experience points needed for endgame progression. Beyond character progression, sealing the gates establishes a satisfying resolution to one of Odyssey's most ambitious narrative arcs.

My Friend Peppa Pig PS5 Game Guide

Navigating the vibrant world of children's digital entertainment reveals a unique gem designed specifically for the youngest generation of gamers. The My Friend Peppa Pig PS5 game guide serves as your essential roadmap to exploring this faithful interactive storybook efficiently. Parents and children can team up to navigate familiar landscapes while unlocking creative narrative moments together.

Creating Your Custom Character

Before jumping into the colorful world, young players have the opportunity to design their own animal companion. The robust character creator allows children to select their favorite animal species and customize their clothing colors easily. This initial step fosters a sense of personal identity and creative investment right from the start of the adventure.

Once the customization process concludes, your custom character is introduced directly to Peppa at her iconic home. This seamless introduction naturally blends the player's creation into the established universe of the show. From here, the game opens up into an open exploration experience tailored for early developmental learning.

Exploring Iconic Town Locations

The core gameplay loop centers around traveling to various beloved landmarks scattered across the virtual town map. Players can visit notable locations such as the bustling supermarket, the playful beach, and even the magical world of Potato City. Each destination features simple movement patterns that ensure minimal frustration for preschool players.

Interacting with the environment triggers localized side tasks that teach basic problem-solving and memory skills. For instance, helping Daddy Pig locate his misplaced glasses or gathering items for a beach picnic provides engaging milestones. These accessible challenges keep the gameplay moving at a relaxed, child-friendly pace.

Meeting Familiar Friends

Throughout your journeys, you will frequently cross paths with a large roster of iconic characters from the television series. Engaging with Suzy Sheep, Mr. Potato, and Danny Dog offers delightful moments that replicate the tone of the animated show perfectly. These encounters frequently lead to interactive mini-games that focus on sharing and friendship themes.

Every conversation is fully voiced by the original cast members, adding an immense layer of authenticity to the interactive platform. This high-fidelity sound design helps early readers follow along with the narrative without needing advanced textual tracking skills. The audio cues guide players through transitions seamlessly.

Unlocking Fun Achievements

Completing specific narrative tasks rewards players with commemorative virtual post cards and special decorative items. Trophies on the modern console platform activate naturally as children explore new areas and finish basic character favors. This rewarding feedback loop encourages curiosity and thorough exploration across the entire map interface.

Parents looking to maximize their shared playtime will find that this title offers a stress-free environment free from difficult combat or time constraints. The relaxed mechanics ensure that every single achievement remains achievable even for absolute beginners. It stands out as an ideal first gaming experience for modern families.

Knights Of The Round FF7 Materia Guide And...

Acquiring the legendary Knights of the Round Materia remains one of the ultimate achievements for players navigating the endgame of Final Fantasy 7. As the most powerful summon in the entire game, this magical orb unleashes thirteen holy warriors to devastate the toughest bosses. Mastering the complex prerequisites to obtain this item requires patience, strategic planning, and a deep understanding of the world map.

The Pre-Requisite Journey of Chocobo Breeding

Before you can even catch a glimpse of this legendary power, you must embark on an extensive chocobo breeding quest. Players need to catch, raise, and mate specific types of chocobos to eventually hatch a rare Gold Chocobo. This multi-generational process requires collecting specific nuts from powerful enemies and racing your mounts at the Gold Saucer to boost their stats.

The entire endeavor serves as a major test of resource management and dedication for completionists. Without a Gold Chocobo, navigating the extreme oceanic terrain to find the hidden sanctuary is completely impossible. Planning your breeding cycle early in the narrative will save you hours of unnecessary backtracking later.

Locating the Hidden Round Island Sanctuary

Once you successfully obtain a Gold Chocobo, you can fly across the world map to search for a completely unmapped landmass. Known to fans as Round Island, this secluded paradise is located in the absolute northeastern corner of the map. It does not appear on the standard in-game radar, making it an exclusive secret for curious explorers.

You must land the Highwind airship nearby or use the unique traversal abilities of your golden mount to cross the deep ocean trenches. Upon arriving, you will discover a small cave nestled amidst the dense greenery of the island. Stepping inside will grant you direct access to the red summon orb waiting on the cavern floor.

Strategic Advantages in Late Game Combat

Unlocking this summon drastically alters your combat capabilities against the most difficult optional super-bosses, Emerald Weapon and Ruby Weapon. The magical spell bypasses standard defensive statistics to deal immense multi-hit damage across a single protracted turn. Combining this ability with the Mime Materia allows your party to repeat the devastating assault without consuming additional magic points.

However, players should note that casting this spell triggers an incredibly long animation sequence during active battles. While the visual spectacle is undeniable, relying on it heavily requires a solid setup to manage your party's health during the downtime. Incorporating this strategy ensures you can conquer the final trials of the narrative with absolute confidence.

Persona 3 Reload Track Team Social Link Guide

Navigating the social landscape of Gekkoukan High School is just as vital as exploring the depths of Tartarus in Persona 3 Reload. Among the earliest relationships players can establish is the Chariot Arcana, which centers around the school athletic department. Managing this bond effectively unlocks powerful fusion bonuses and offers a deep look into character resilience under physical stress.

How to Unlock the Chariot Social Link

Initiating this storyline is a straightforward process that becomes available early in the spring semester. The protagonist can formally join the Gekkoukan Track Team starting on April 23rd by visiting the practice field. If you miss this window, the game will automatically initiate the relationship later in May to ensure you do not miss out on the Chariot Arcana.

Once the club is joined, you will meet Kazushi Miyamoto, a dedicated athlete dealing with heavy personal expectations. He can regularly be found waiting outside the Classroom 1F corridor on designated club days. Engaging with him during these afternoons advances the narrative and pushes your bond closer to completion.

Maximizing Dialogue Choices and Affection Points

Progressing through the ten ranks requires balancing empathy with an understanding of Kazushi's headstrong personality. He responds best when the protagonist supports his intense work ethic while quietly looking out for his physical well-being. Selecting choices that show unconditional camaraderie will maximize the affection points earned during rank-up conversations.

Bringing a matching Chariot Arcana Persona in your active inventory is highly recommended before starting any event. This matching bonus significantly boosts the effectiveness of your answers, reducing the need for dead-end hangouts. If you fall short of points between ranks, drawing a fortune at the Naganaki Shrine during the evening can help bridge the gap.

Navigating Kazushi's Character Arc

The core narrative of the Track Team storyline centers heavily on themes of perseverance, hidden injuries, and personal duty. As the ranks progress, players learn that Kazushi is hiding a serious knee injury to honor a promise made to his family. This setup forces the protagonist to choose between enabling his destructive training habits or urging him to rest.

The story offers a mature look at how young athletes handle external pressure and the fear of losing their dreams. By supporting him through this dilemma, Kazushi eventually learns the value of physical recovery and emotional honesty. Reaching the final rank permanently solidifies the friendship and grants the ultimate token needed to fuse the strongest Chariot Persona.

Nora Fries Location In Batman Arkham City

Finding Nora Fries in Batman Arkham City is one of the most memorable side missions available in the game, triggering the Heart of Ice quest. After your intense boss battle against Mr. Freeze in the Gotham City Police Department building, the tragic villain begs the Dark Knight to track down his missing wife. Solving this mystery requires navigating the dangerous Industrial District and scanning for clues to uncover her hidden resting place.

Triggering the Heart of Ice Side Mission

Before you can begin searching for Nora, you must progress through the main story until you successfully defeat Mr. Freeze at the GCPD. Following the confrontation, Victor Fries will express his desperation regarding his cryogenically frozen wife, who has been taken by the Joker. Accepting this request adds the Heart of Ice mission to your log, giving you a general starting point to investigate near the Joker's heavily guarded territory.

To start your search efficiently, open your map screen and look closely at the upper northern section of the Industrial District. You will notice a general objective indicator marking the vicinity where the Joker's thugs have hidden the capsule. Setting this location as your primary waypoint will help you navigate the crowded rooftops safely as you glide toward the target zone.

Navigating the Industrial District Warehouse

The true challenge lies in pinpointing the exact building containing Nora, which is a nondescript warehouse situated right at the water's edge. Look for a structure sitting on the northern coastline of the district, directly facing the open water. The entrance to this specific area is cleverly hidden behind a structural wall that requires tactical demolition to bypass.

Drop down onto the small wooden dock or ice raft floating directly in front of the warehouse's northern facade. Use Batman's explosive gel tool on the weak, breakable section of the wall to blow open a new passageway into the facility. Once inside, you will need to grapple up and navigate through a series of vents to avoid alerting the heavily armed guards stationed within the room.

Securing Nora and Completing the Quest

Inside the facility, you will discover a group of the Joker's henchmen guarding the cryogenic chamber where Nora rests. Using structural vantage points and stealth takedowns is highly recommended to safely neutralize the guards without risking civilian casualties. Once the room is fully secured, approach the large glass capsule to update Batman's objective log.

After examining the chamber, Batman will automatically contact Mr. Freeze over his communication network to share the precise coordinates of the warehouse. To fully finalize the mission, you must return all the way back to the GCPD building where Victor is waiting. Speaking with Freeze closes the quest loop, rewarding you with an upgraded gadget and providing a touching conclusion to the couple's tragic story arc.

How To Free Up Disk Space On Steam...

Managing a massive digital gaming library often requires clearing out older titles to make room for fresh installations on your computer hard drive. Modern PC games routinely exceed one hundred gigabytes in size, quickly overwhelming even dedicated solid-state drives. Learning how to efficiently utilize built-in storage tools ensures your operating system maintains optimal performance while keeping your favorite titles ready to play.

Navigating the Built-In Steam Storage Manager

The desktop client features an integrated visual dashboard designed to streamline data oversight across multiple connected drives. Users can access this portal by opening the application settings, navigating to the downloads tab, and selecting the storage management option. This interface presents a color-coded breakdown showing exactly how much space games, downloadable content, and temporary workshop files occupy.

From this centralized hub, players can easily select multiple items simultaneously using checkmarks to execute batch operations. The platform allows you to completely remove software configurations or safely transfer entire installations to alternative local drives without losing individual configuration files. This dashboard removes the need to manually hunt down hidden folders hidden within complex system directories.

Uninstalling and Moving Games Efficiently

When local storage limits are reached, deleting rarely played installations is the most immediate way to recover valuable gigabytes. Right-clicking a title within your library and selecting the manage option permits a secure cleanup that preserves cloud saves and personal profile achievements. This ensures you can reinstall the game at a later date and resume progress exactly where you left off.

Alternatively, migrating software data to an external hard drive or a secondary internal drive offers an excellent compromise for preservationists. The application handles directory updates automatically during the migration process, meaning shortcuts and launcher paths remain fully functional. Utilizing a slower mechanical drive for archiving larger titles keeps your primary high-speed solid-state drive open for competitive games that require rapid loading times.

Clearing Shader Cache and Temporary Downloads

Hidden system data often accumulates silently in the background, consuming substantial drive capacity over prolonged periods of active use. The client frequently stores pre-compiled shader graphics tailored to your specific video card to reduce in-game stuttering during live gameplay rendering. While highly beneficial for performance, these graphics libraries can become obsolete after major software patches or driver updates.

Navigating to the specialized settings menu allows users to safely purge these temporary files and reset the local download buffer. Clearing the client cache forces the system to delete incomplete update packages that might be taking up space unnecessarily. This maintenance step frequently resolves download queues that appear stuck while freeing up considerable blocks of storage.

Managing Workshop Subscriptions and Cloud Data

Community-created modifications and custom map expansions can quietly bloat local directories far beyond the base game footprint. Subscribing to numerous assets in the community hub causes the client to download large files that remain active even if the core game is rarely launched. Periodically reviewing your active subscriptions lets you prune outdated modifications that no longer receive developer support.

Dedicated third-party visualization utilities can also assist in tracking down stray files left behind by legacy configurations. These diagnostic tools map out your directory structure visually to reveal exceptionally large folders that survived standard uninstallation procedures. Maintaining a lean installation footprint ensures your machine operates efficiently during intense gaming sessions.

Driver Gloves Imperial Plaid Patterns And Market Guide

The virtual economy of Counter-Strike 2 continues to thrive, with weapon finishes and cosmetic apparel maintaining significant real-world value among dedicated players. Among the most iconic hand coverings available, the Driver Gloves Imperial Plaid stand out due to their elegant design and royal aesthetic. Navigating the specific visual variations and market mechanics of this premium item requires a deep understanding of pattern tiers and float values.

Understanding the Imperial Plaid Aesthetic

Introduced to the tactical shooter community as part of a major weapon case update, these gloves quickly earned a reputation for sophistication. The design features a striking combination of deep purple flannel fabric interwoven with traditional dark grid patterns. This textured textile top is seamlessly paired with premium leather palms that provide a clean look during intense gameplay animations.

Unlike bulkier tactical gear, the driver variant offers a low-profile silhouette that fits perfectly with many popular knife finishes. Collectors frequently pair this specific item with Doppler or Ultraviolet blades to create visually cohesive loadouts. The unique color scheme ensures that players stand out in competitive lobbies without distracting from historical gameplay crosshairs.

Analyzing Pattern Tiers and Symmetry

The look of individual gloves is heavily dictated by the specific pattern index assigned to the item upon unboxing. There are multiple distinct pattern variations available, which enthusiasts categorize into numerical tiers based on visual consistency. Tier 1 patterns are highly coveted because they feature centered squares and excellent symmetry between both hands.

When a pattern is symmetrical, the horizontal and vertical lines align perfectly across the knuckles of the digital character model. As the pattern index shifts into lower tiers, the grid lines may appear slightly offset or skewed to one side. While these slight shifts do not impact competitive performance, they introduce minor imperfections that highly analytical traders look out for.

Evaluating Float Values and Exterior Wear

The overall market value and visual clarity of these gloves are heavily influenced by the condition parameters, known within the community as float values. In Factory New condition, the purple fabric remains exceptionally bright, and the leather surfaces show virtually zero scuffs or discoloration. However, securing a flawless pair is incredibly rare due to the strict probability distribution curves built into the game drops.

As the condition drops into Minimal Wear or Field-Tested states, noticeable fading begins to appear near the knuckles and wrist straps. Players looking to optimize their gaming budgets frequently target the higher end of the Field-Tested float bracket to maximize visual appeal without spending excessive amounts. Understanding these distinct wear thresholds allows buyers to make informed financial decisions when browsing active digital trading hubs.

Current Market Trends and Acquisition Strategies

The pricing structure for this high-tier cosmetic remains dynamic, reacting to seasonal game updates and shifting community preferences. Interested buyers can try their luck by opening specific weapon containers, though purchasing the item directly from verified digital platforms represents a much safer allocation of resources. The premium nature of the purple color palette ensures that demand remains steady across international trading communities.

Before executing a trade or investment, it is highly recommended to inspect the specific model in a live community server to verify line alignment. Looking ahead, these sophisticated driving accessories are expected to maintain their status as timeless cornerstones of luxury virtual loadouts. By paying close attention to wear placement and tier classifications, you can secure an impressive pair that enhances your digital collection.

How To Join A PlayStation Party On PC...

Cross-platform gaming has brought friends closer together, allowing PC and console enthusiasts to share the same digital battlefields. However, communicating smoothly across different ecosystems used to require complex setups or uncomfortable hardware compromises. Thankfully, modern integration options have bridged the gap, making it simpler than ever to connect with your friends on the PlayStation Network directly from your desktop interface.

Setting Up the Official Cross Platform Integration

The most seamless way to access your console friend group is by leveraging the official Discord integration built into the PlayStation ecosystem. You will need to link your PlayStation Network account to your Discord profile through the user settings menu on your computer or mobile app. Once authorized, this connection allows you to transfer voice channels directly from your desktop interface to the console framework.

This method eliminates the need for separate audio mixers or using multiple headsets simultaneously while playing your favorite games. It provides a clean digital bridge that ensures high-fidelity voice transmission without impacting your computer's gaming performance. Millions of players utilize this integrated system daily to coordinate strategies across different hardware platforms smoothly.

Utilizing the Desktop PlayStation Application Framework

Another reliable approach involves using specific software solutions provided within the evolving ecosystem of modern video games. Certain first-party titles released on desktop platforms now feature a dedicated PlayStation overlay accessible via a quick keyboard shortcut. This interface allows you to view your network profile, manage incoming game invites, and coordinate communication directly with your console contacts.

If a specific title does not support the built-in overlay, players can utilize the mobile PlayStation application alongside virtual audio routing software on their desktop. By routing the audio signal through your computer's input system, you can maintain communication while keeping your hands on your mouse and keyboard. This setup ensures you never miss an invitation from your console team members during intense gaming sessions.

Optimizing Audio Settings for Clear Communication

Achieving crisp audio quality requires adjusting a few critical parameters within your chosen desktop operating system. You should navigate to your sound control panel to ensure your preferred microphone is designated as the primary communication device. Adjusting the microphone gain levels prevents your voice from clipping or transmitting excessive background noise during quiet moments.

Many players also benefit from enabling noise suppression features built into modern communication clients to filter out mechanical keyboard clicks. It is equally important to balance the incoming chat volume against your current in-game sound effects so you can hear callouts clearly. Taking a few minutes to configure these options guarantees a stable and professional audio experience for everyone involved.

Troubleshooting Common Connection Bottlenecks

Occasionally, digital restrictions or network mismatches can prevent you from entering a voice lobby successfully. If you encounter errors, verifying that your privacy settings allow cross-network communication is the first critical step to resolve the issue. Restrictive NAT types on your home router can also block communication packets, so checking your connection stability remains highly recommended.

Restarting your communication client or re-linking your network accounts frequently clears out temporary software glitches that cause unexpected disconnects. Ensuring all related software applications are updated to their latest versions will minimize compatibility conflicts. With these simple troubleshooting steps, you can quickly return to your multiplayer session without further audio interruptions.

Diplomacy Is Not An Option Cheats Complete Cheat...

Surviving the relentless onslaught of enemy hordes in the physics-driven strategy game Diplomacy is Not an Option can test the resolve of even the most experienced commanders. Balancing resource distribution, economic infrastructure, and military recruitment frequently creates bottlenecks that can quickly lead to the collapse of your settlement. Incorporating custom testing commands and debug features allows players to adjust the simulation rules, enabling them to safely experiment with various defense systems and base layout strategies.

Activating the Developer Console for Testing

Accessing built-in debug commands in modern strategy games provides a direct method for testing complex structural mechanics without spending hours gathering resources. In this survival title, developers integrated functional command options to help analyze performance and simulate late-game siege conditions during the production cycle. Accessing these configurations generally requires entering specific engine launch parameters through your game client properties or utilizing an active pause menu sequence during gameplay.

Once the system successfully registers the configuration, inputting targeted phrases allows players to quickly bypass standard economic constraints. Utilizing these tools transforms the brutal campaign into a highly customizable sandbox environment where you can freely experiment with radical castle designs. This targeted testing methodology ensures you can uncover optimal defense choke points without risking your primary campaign progression file.

Altering Economic Resources and Building Speed

Managing the supply chains for stone, iron, wood, and food represents the foundational challenge of building a sustainable medieval fortress. By employing debug tools, administrators can instantly replenish depleted stockpiles to ensure that constructing advanced ballista towers or thick stone walls never stalls. This allows players to immediately test how specific base structural layouts hold up against massive, physics-calculated enemy collisions.

Furthermore, removing the construction cooldowns allows for real-time strategic adaptation during massive waves of hostile peasants. If a specific quadrant of your wall begins to buckle under pressure, using developmental assistance allows you to erect emergency barricades instantly. This dynamic experimentation provides deep insights into how different fortification layouts redirect enemy movement paths effectively across the battlefield.

Manipulating Units and Army Attributes

Commanding massive battalions requires an understanding of positional tactical advantages, unit range limitations, and overall soldier movement speeds. Modifying unit attributes through backend configurations lets commanders evaluate the ultimate performance limits of archers, swordsmen, and heavy siege machinery. You can instantly spawn specialized squads to reinforce struggling sectors or test the offensive efficacy of specific army compositions.

Adjusting these unit parameters also gives players a clearer perspective on how mass enemy AI routing behaves when facing different defensive formations. Observing how tens of thousands of attackers interact with your customized units under controlled conditions provides unique combat insights. These practical observations ultimately improve your standard, unassisted tactical planning when playing through the core survival scenarios.

Enabling God Mode and Creative Freedom

For players who prefer focused city planning over stressful survival management, establishing complete invulnerability offers an exceptional path forward. Activating god mode parameters prevents enemy forces from destroying crucial city center hubs or slaughtering innocent working citizens. This specialized configuration turns a stressful siege simulator into a relaxing, creative medieval construction environment.

Securing absolute immunity from enemy damage allows you to focus exclusively on aesthetic balance and optimal storage warehouse placement. You can carefully study how road networks impact overall citizen efficiency without worrying about incoming catapult projectiles. Ultimately, mastering these hidden variables guarantees that you can enjoy the full depth of the game mechanics at your own preferred pace.

What Gifts Does Sebastian Like In Stardew Valley...

Building a strong relationship with the residents of Pelican Town is a core element of the Stardew Valley experience, yet some characters are trickier to please than others. Sebastian, the reclusive programmer who lives in the basement of the carpenter shop, is notorious for having unique tastes that differ significantly from most villagers. Understanding his specific preferences will save you valuable time and resources as you attempt to raise his friendship levels.

The Ultimate Loved Gifts for Sebastian

To maximize your friendship points quickly, you should focus on gathering items that Sebastian absolutely loves. He is a big fan of Frozen Tears and Obsidian, both of which can be found while exploring the deeper levels of the local mines. Additionally, Sebastian enjoys high-quality cooked dishes like Sashimi and Pumpkin Soup, making upgrading your farmhouse kitchen a worthwhile investment.

Unlike many other eligible bachelors in the valley, Sebastian also carries a deep appreciation for Void Eggs. This makes raising Void Chickens on your farm an incredibly efficient strategy for securing a steady supply of his favorite items. Gifting him these specific items on his birthday will yield an enormous boost to your overall relationship standing.

Items to Avoid When Gifting

While discovering what he loves is crucial, knowing what Sebastian dislikes is equally important for avoiding setbacks. He famously detests almost all forms of alcohol, so bringing him a standard beer or pale ale from the saloon will result in a negative reaction. He also possesses a strong aversion to flowers, meaning traditional foraging items like Sweet Peas or Daffodils will not work well.

Many players mistake common liked items as safe options, only to find that Sebastian rejects them entirely. Clay and Complete Breakfast are also on his hated list, which surprises many newcomers trying to clear out their inventory. Keeping these specific restrictions in mind ensures that your daily interactions remain purely positive.

Maximizing Friendship Efficiency

Securing the right items is only half the battle, as timing your gifts plays a massive role in relationship progression. You are permitted to give Sebastian up to two gifts per week, alongside an extra offering specifically on his winter birthday. Tracking his weekly routine is essential because he spends a significant portion of his day locked inside his bedroom coding.

For players looking to streamline their daily farm management and relationship tracking, utilizing certain tools can make a massive difference. You can easily keep track of character locations and schedules by checking out helpful community databases online. Planning your travel route past the mountain lake during the rainy evening hours is often the best strategy to encounter him outside his basement room.

Building a Lasting Connection

Investing the time to understand Sebastian rewards players with unique dialogue options and deep character development. As your friendship grows, he opens up about his feelings of isolation, his passion for motorcycles, and his complicated family dynamics. These narrative milestones add substantial depth to the immersive world of Pelican Town.

Ultimately, consistency is the true secret to winning over this mysterious resident. By stocking up on Obsidian during your mining trips and saving Sashimi from your fishing hauls, you can effortlessly max out his heart meter. Taking a methodical approach to his unique preferences turns a difficult relationship pursuit into a highly rewarding gameplay achievement.

Why Steam Download Speed Drops To Zero

Many PC gamers experience extreme frustration when downloading or updating their favorite titles on Steam, only to watch the transfer rates plummet unexpectedly. It can be incredibly perplexing to witness your hyper-fast internet connection suddenly grind to a complete halt without any obvious warning signs. Understanding the mechanics behind how Steam processes files reveals that this behavior is often a normal part of the installation routine rather than a broken network connection.

The Storage Drive Bottleneck

The most frequent culprit behind a sudden drop in transfer speed is your computer's storage hardware struggling to keep pace with the network traffic. When downloading a game, Steam retrieves heavily compressed data packages that must be extracted and written directly to your solid-state drive or traditional hard drive. If your disk's write performance hits maximum utilization, Steam will pause the network download to allow the storage hardware to finish processing the existing queue.

This disparity is particularly noticeable for users with gigabit internet connections coupled with older mechanical hard drives or slower external media. The application will cycle through periods of intense downloading followed by flatlined network activity while the processor and disk handle the decompression load. Upgrading your secondary game folders to a modern NVMe solid-state drive can substantially minimize these hardware processing delays.

Local Configuration and Server Restrictions

Another common variable involves your internal client configurations and the digital proximity of the selected content servers. Steam automatically assigns a regional server based on your location, but these specific network nodes can occasionally become overloaded during massive launch windows or major seasonal sales. When local server queues peak, data packet distribution fluctuates wildly, causing the client to constantly stop and start the download sequence.

Gamers can mitigate these traffic jams by manually adjusting their download region within the primary application settings menu. Choosing a nearby geographic area that is currently in a different time zone can grant access to quieter, more stable network distribution hubs. Additionally, ensuring that no intentional bandwidth limits are enabled in your preferences ensures the application can request data as efficiently as possible.

Security Software and Background Interference

Active security programs and aggressive network settings can also actively disrupt the continuous stream of incoming gaming data. Real-time antivirus scanners often inspect every newly unpacked file as it enters the storage drive, adding an extra layer of processing delay that triggers a download pause. If the security software takes too long to verify the integrity of the downloaded chunks, Steam will delay incoming packets to avoid overwhelming the operating system.

To solve this, players can add their primary installation folders to their active security software exclusion list. It is also beneficial to verify that background applications are not hogging vital system memory or processing threads during the update cycle. Ensuring your computer devotes its maximum computational resources to the client guarantees a much smoother and continuous data transfer experience.

Lies Of P King Of Riddles Guide

Lies of P has captivated action RPG fans with its dark atmosphere and complex gameplay systems that heavily reward careful exploration. Among the many mysteries scattered throughout the city of Krat, the psychological game of wits orchestrated by the enigmatic King of Riddles stands out as a major highlight. Successfully deciphering his voice on the ringing public telephones requires both intuition and a strong understanding of the game's underlying lore.

Finding the Ringing Telephones

As you explore the decaying streets of Krat, you will occasionally hear the jarring sound of a ringing telephone echoing through the area. These specific interaction points serve as the primary communication channels for Arlecchino, the puppet mastermind behind the grand puzzles. Finding every single phone location is essential because missing a call can delay your progression through the overarching mystery.

The first telephone encounter occurs relatively early in the campaign, specifically near the Krat City Hall area. Paying close attention to audio cues while wandering through new districts will ensure you never walk past a ringing station. Each successful conversation shifts your standing in this bizarre game and unlocks the paths to hidden sanctuaries.

Answering the Riddles Correctly

When you answer the call, the King of Riddles will present a poetic puzzle that challenges your logical thinking. Providing the correct response immediately rewards you with a coveted Trinity Key, which is used to unlock secret vaults. If you choose poorly, you may need to complete a secondary task or sacrifice a resource to secure your reward.

The queries range from basic word puzzles to complex moral dilemmas regarding the nature of monsters and humans. Taking a moment to consider the dark themes of the narrative will generally point you toward the correct choice. Staying observant during conversations helps maintain a perfect record against his psychological tricks.

Locating the Secret Trinity Sanctums

Securing the keys is only half the battle, as you must track down the corresponding green Trinity Doors hidden across the world. These secure vaults contain high-tier defensive gear, rare upgrading materials, and unique cosmetic outfits that significantly boost your combat capabilities. Exploring hidden corners within major legacy dungeons will eventually reveal these grand metallic entrances.

One particularly famous sanctum is located within the industrial depths of the Venigni Works facility, requiring careful platforming to reach. Opening these rooms also provides deeper context regarding the tragic history of Krat and its mechanical inhabitants. You can read more about various optimization strategies on our hub to maximize your build capacity.

Meeting the Puppet Mastermind

The final culmination of this extensive side quest takes place deep within the subterranean levels of the Arche Abbey. With the final key in hand, players can enter the inner sanctum to meet Arlecchino face-to-face in his true form. This narrative encounter delivers major revelations that alter how you perceive the entire puppet rebellion.

During this final conversation, your choices will determine the ultimate resolution of his personal storyline and grant the final legendary rewards. Engaging with this fascinating character completely enriches the narrative landscape of the game. Conquering his final trial marks a true milestone for any dedicated completionist exploring Krat.

Why Better Judgment Beats Bigger Dreams

Many individuals are drawn to the excitement of massive goals and grand visions, often overlooking the practical steps required to reach them. While having ambitious aspirations can provide initial motivation, relying solely on grand illusions without logical boundaries frequently leads to avoidable setbacks. Developing a disciplined approach focused on sound decision-making ensures that your progress remains steady and sustainable over time.

The Danger of Overextended Ambitions

Chasing immense milestones without a realistic roadmap often creates a blind spot for immediate risks. When expectations are set excessively high, the pressure to succeed can lead to emotional decisions rather than calculated choices. True progress relies on evaluating your current situation accurately instead of relying on ideal scenarios.

By prioritizing careful evaluation over ungrounded optimism, you protect your resources from being spread too thin. This analytical mindset allows you to identify potential flaws in a plan before they cause significant damage. Experienced strategists know that minimizing errors is far more valuable than pursuing a flawless, unrealistic victory.

Building Consistency Through Measured Steps

Shifting your focus toward smaller, manageable objectives helps establish a foundation of reliability. Making decisions based on verified data and realistic outcomes builds long-term confidence that fancy dreams cannot provide. Each well-planned step reduces volatility and keeps your long-term plans securely on track.

When analyzing complicated situations, relying on verified platforms and tools can significantly improve your overall accuracy. For example, individuals looking for stable metrics and reliable sports updates often utilize the M88 Msports Login portal to gather essential data. Accessing structured insights ensures that your strategic choices are grounded in current reality rather than guesswork.

The Intellectual Shift to Risk Management

Embracing better judgment means accepting that patience is a vital component of any successful strategy. It requires the discipline to reject high-risk opportunities that lack a clear statistical or logical advantage. This level of self-control separates seasoned analysts from those who constantly chase temporary trends.

Protecting your bankroll or capital involves acknowledging your personal limitations and maintaining strict operational boundaries. When you base your actions on strategic logic, you remove the emotional highs and lows associated with reckless guessing. Sustained growth is ultimately the product of disciplined choices repeated consistently over time.

Winning with Tactical Precision and Planning

Achieving success in high-stakes competitive environments requires more than just raw ambition and hard work. True excellence depends heavily on a structured methodology that merges meticulous long-term planning with sharp operational execution. By understanding how to balance these two essential pillars, individuals and teams can consistently outperform their competition.

The Core of Tactical Precision

Tactical precision begins with an accurate assessment of your current resources and immediate surroundings. Every minor action must be calculated to minimize waste while maximizing the overall impact on the field. Leaders who master this skill can quickly spot vulnerabilities in an opponent's strategy and move to exploit them efficiently.

Furthermore, maintaining high precision prevents costly errors during intense, fast-paced situations. It requires continuous practice and an unwavering focus on minor operational details that others might easily overlook. Over time, this disciplined approach builds a reliable foundation for achieving repeatable victories.

The Power of Strategic Foresight

While immediate tactics help win individual engagements, long-term planning ensures sustainable victory over time. Developing a comprehensive roadmap allows teams to prepare for various potential scenarios before they actually unfold. This proactive mindset transforms unexpected challenges into predictable milestones that can be managed easily.

Incorporating flexible contingencies within your main plan is vital for navigating unpredictable shifts in competitive landscapes. A rigid strategy often crumbles under pressure when facing an innovative or highly aggressive adversary. Dynamic planning allows you to adjust your long-term goals without losing operational momentum.

Executing Under Intense Pressure

Executing a well-crafted plan requires emotional control and sharp decision-making habits when the stakes are high. Panic frequently leads to rushed decisions that can undermine months of careful preparation and strategic alignment. True professionals remain calm, analyzing real-time data to adjust their immediate steps without losing sight of the objective.

To study how elite performers maintain operational excellence under pressure, many enthusiasts analyze professional digital platforms. For example, reviewing competitive gaming systems via an active M88 Msports Login offers excellent insights into real-time tactical adjustments. Observing these high-level environments helps clarify the deep connection between mental discipline and tactical execution.

Analyzing Outcomes for Continuous Growth

The journey toward mastering any complex discipline demands regular post-performance reviews and honest self-assessment. Examining past failures helps highlight recurring errors that need immediate correction before the next major challenge. This consistent feedback loop ensures that your operational tactics remain sharp, modern, and highly effective.

Every setback provides a unique opportunity to refine your planning methods and enhance tactical awareness. Embracing a growth mindset allows individuals to transform frustrating losses into powerful educational experiences. Through persistent execution and detailed analysis, any dedicated competitor can elevate their performance to elite levels.
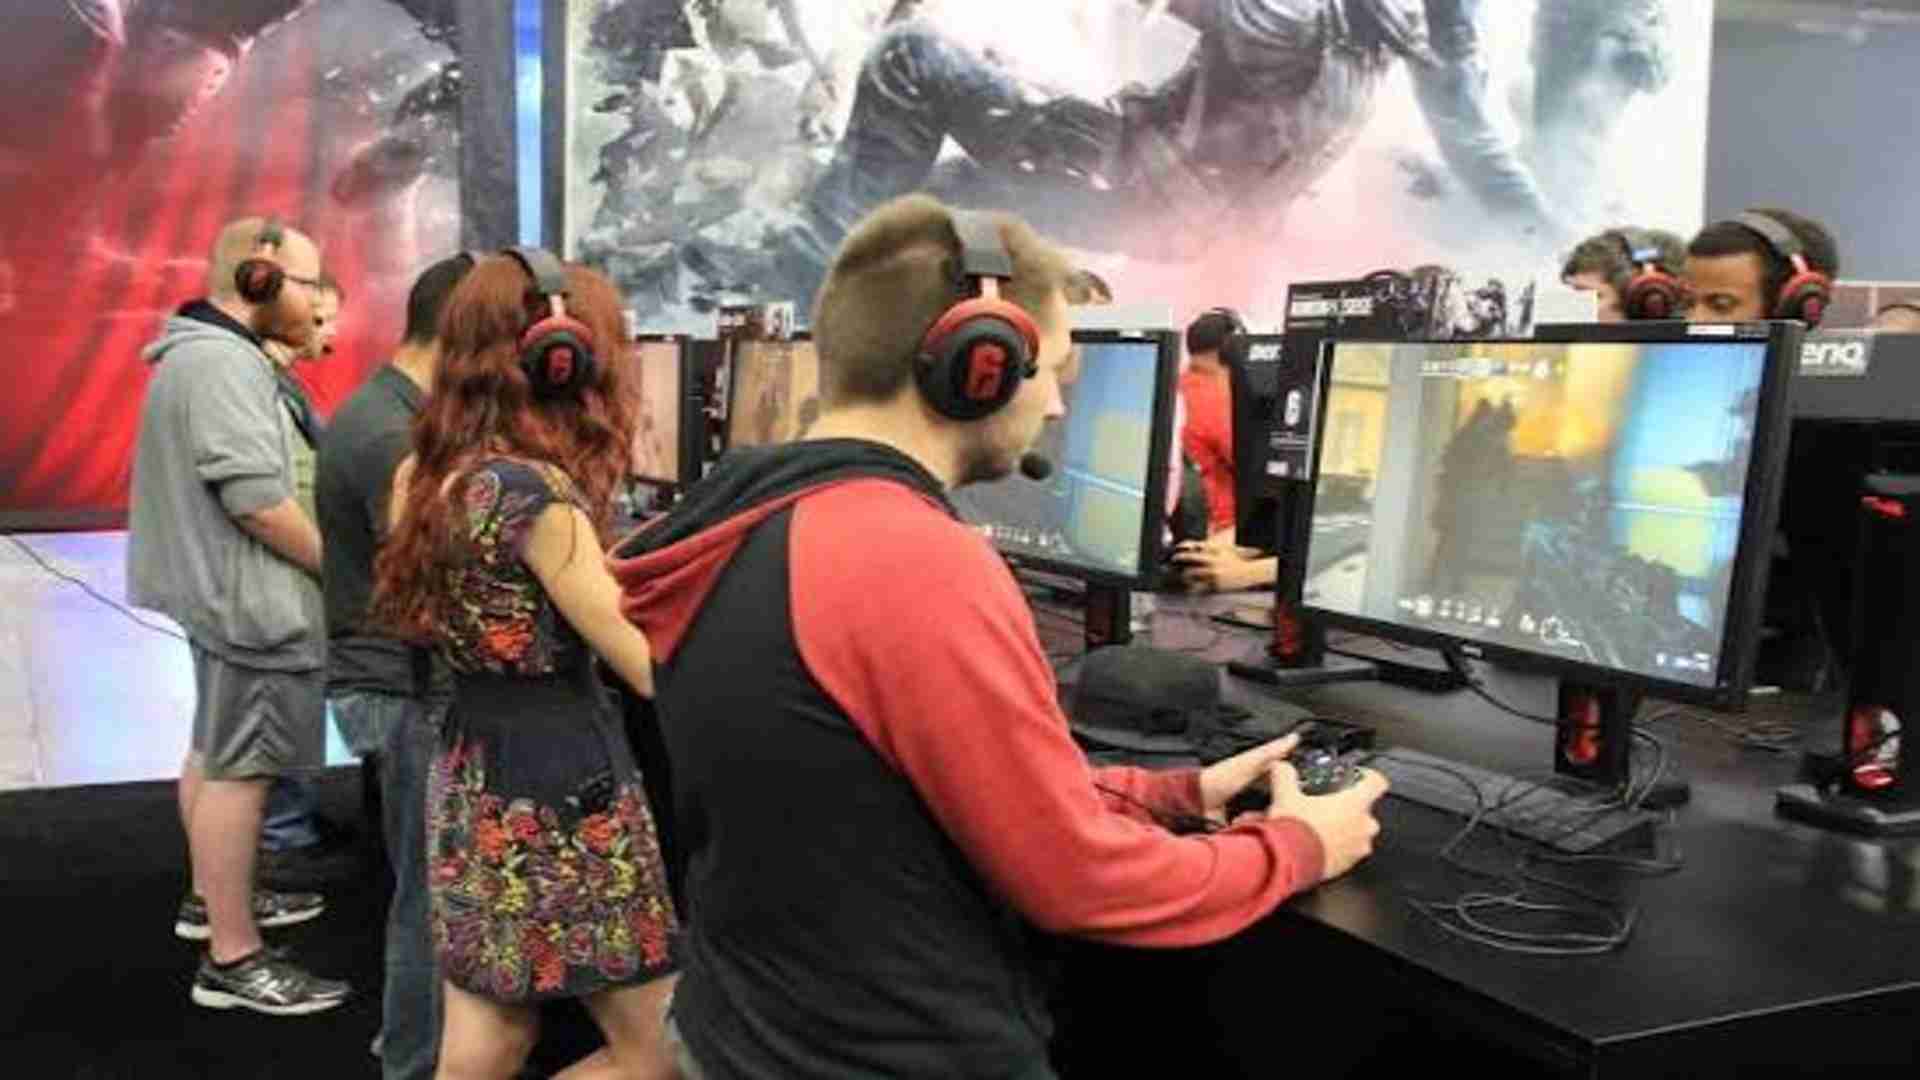
Wheel Games That Make Randomness Fun

Wheel games have captured the imagination of players for centuries by transforming absolute uncertainty into a source of pure entertainment. The simple mechanics of watching a pointer tick past various segments creates an engaging loop of anticipation and joy. By focusing on simple engagement rather than complex rules, these games prove that unpredictable mechanics can be incredibly satisfying for players of all levels.

The Psychology behind Unpredictable Fun

Human psychology naturally craves the thrill of a variable reward system, which is why a spinning wheel remains so captivating. When the final outcome is left entirely to chance, it removes the intense pressure of making strategic mistakes. This shifting dynamic allows participants to fully relax and immerse themselves in the unfolding spectacle without overthinking each round.

Furthermore, the visual build-up as the friction slows down the wheel creates a shared moment of suspense. Every small tick represents a shifting possibility, turning a basic mathematical probability into an emotional journey. This unique structure ensures that each individual spin delivers a fresh burst of excitement regardless of previous results.

Balancing Simplicity and Digital Innovations

Modern developers have successfully moved this classic concept into the digital landscape while retaining its historical charm. Online platforms regularly introduce creative themes, multi-layered multipliers, and live hosts to elevate the overall user interaction. These enhancements ensure that the core mechanics remain accessible while offering modern visual elements that appeal to tech-savvy audiences.

For players seeking a smooth gaming experience on the go, utilizing reliable interfaces like m88.com mobile can make exploring these variants incredibly convenient. Finding an optimized digital platform allows you to appreciate the visual design and responsive tracking features without technical interruptions. A stable connection ensures you never miss the peak moment of suspense as the pointer settles into place.

How Multiplying Elements Shift the Experience

One of the main reasons contemporary wheel designs remain highly engaging is the clever inclusion of bonus zones. Instead of offering static rewards, many versions feature unpredictable modifiers that can dramatically alter the payout structure on a single turn. This additional layer keeps the gameplay dynamic and prevents the session from feeling repetitive over extended periods.

These bonus mechanics often trigger secondary mini-games, which temporarily shift the focus away from the main interface. By combining random physics with interactive digital choices, developers successfully create an ongoing sense of discovery. This careful balance keeps the overall experience fresh, as players can never truly predict what the next round will bring.

Practical Tips for Enjoyable Gaming Sessions

To keep your relationship with casual gaming healthy and enjoyable, establishing structured boundaries before playing is essential. Since random outcomes cannot be influenced by personal skill, treating the activity strictly as a form of light entertainment is the best mindset. Setting firm session limits helps preserve the intrinsic fun and keeps the experience stress-free.

It is also beneficial to explore different thematic variations to see which style aligns best with your visual preferences. Some designs focus heavily on cinematic presentation, while others prioritize quick rounds and straightforward payouts. Prioritizing well-regulated environments ensures a safe and transparent experience from the first spin to the last.